Choosing equipment for a wall-printing business requires more than comparing prices and colorful sample images. A suitable Wall Printer Machine 3d Wall should match your materials, workspace, artwork, and production goals. A machine that performs beautifully on smooth plaster may struggle with brick, textured paint, or slightly damp surfaces. That difference matters during real installations.
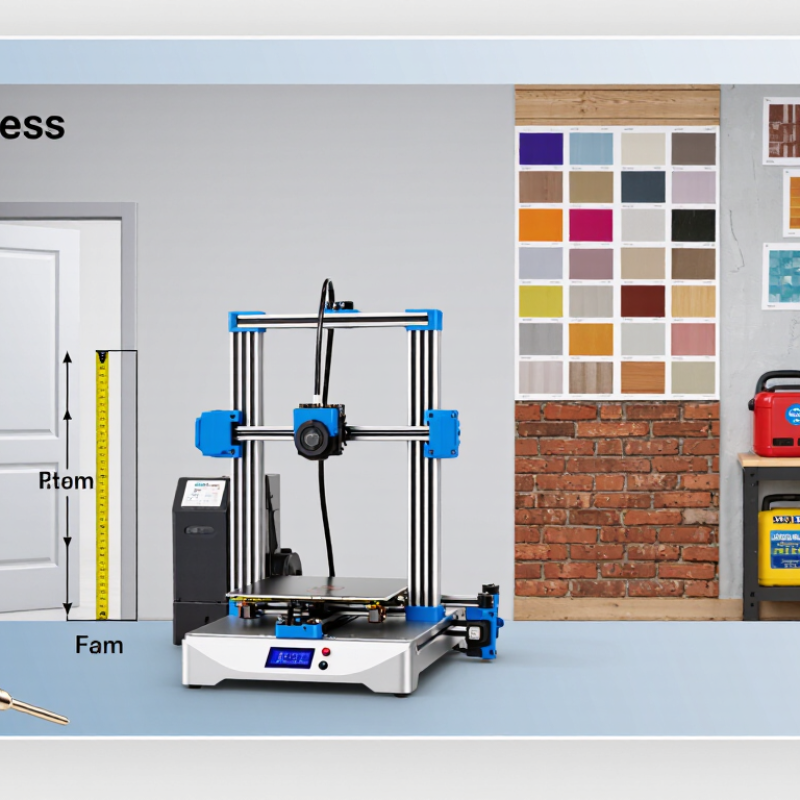
This guide presents seven practical tips for evaluating a wall printer machine. It examines print height, ink performance, surface compatibility, software control, maintenance, safety, and after-sales support. Check the usable print width. Measure your doorway. Confirm whether the printer can pass through your workshop entrance. Small details often decide whether equipment works smoothly or creates daily frustration.
Look for documented specifications, clear warranty terms, and demonstration results on surfaces similar to yours. Ask suppliers about nozzle cleaning, replacement parts, curing time, and technical response times. Reliable manufacturers should explain limitations instead of promising perfect results everywhere. No printer wins every wall. That is worth remembering.
A strong choice should produce sharp edges, stable color, and consistent layer alignment across repeated projects. It should also be manageable for trained operators, not dependent on one expert technician. Some buyers focus too heavily on resolution. In practice, calibration, ink quality, and surface preparation may influence the final image more. Your first decision may still be imperfect. Leave room for testing, adjustment, and honest feedback before purchasing.
Choosing a wall printer machine for 3D walls begins with understanding the wall itself. Start with the wall. Use a long straightedge to check flatness across several sections. Small dips may distort printed lines, while larger uneven areas can affect printhead distance and ink placement.
Texture can mislead. A lightly textured surface may accept ink after cleaning and priming. Deep grooves, loose plaster, or exposed aggregate usually require surface repair first. Run a small test print before committing to the full design. I once underestimated a rough corner, and the pattern looked stretched after printing. That shortcut was expensive.
Moisture changes everything. Check the wall with a moisture meter, especially near bathrooms, exterior corners, windows, and recently repaired areas. Damp surfaces can weaken adhesion, alter drying time, and cause color variation. Do not rely only on touch; a wall may feel dry while retaining moisture underneath. Follow the recommended moisture limits for the ink and substrate.
Measure the usable surface area carefully. Record wall height, width, obstacles, baseboards, sockets, and narrow access points. A large wall may need a printer with longer travel capacity or accurate repositioning controls. Smaller rooms demand compact movement and stable leveling. Leave extra space for setup, cleaning, and maintenance. My measurements have been wrong before, usually around trim and door frames. Recheck them before selecting the machine.
Choosing a wall printer requires more than accepting the highest DPI number. Smithers’ 2023 digital print report valued the global market at approximately 136 billion dollars. It forecasts growth toward 230 billion dollars by 2028. This expansion reflects automation and customization, not resolution alone. A 300 DPI machine can produce clean, attractive murals when viewed from two meters away. It also usually offers faster output and lower ink consumption. That matters on large walls.
For detailed 3D wall graphics, 600 DPI can preserve thin contours, small text, and subtle shadows. However, DPI claims can mislead. Ink drop size, printhead alignment, color management, and wall texture affect visible quality. Fogra’s technical guidance emphasizes measurement and controlled test conditions for reliable print evaluation. Ask for a printed sample on a similar surface. Inspect a one-square-meter panel at normal viewing distance. Check skin tones, dark gradients, edge sharpness, and repeated patterns. Small text should remain readable.
Do not judge only under bright showroom lighting. Test uneven plaster, painted concrete, and lightly textured surfaces. A 600 DPI setting may add time without adding useful detail. That is easy to overlook. A practical compromise is 300 DPI for broad decorative areas and 600 DPI for close-view feature sections. Still, every wall behaves differently, so a site test should influence the final purchase more than a specification sheet.
When choosing a wall printer for 3D wall projects, question every productivity claim. A quoted output of 30 square meters per hour may reflect a single-color test on a smooth wall. Real rooms include corners, height changes, pauses, and alignment checks. Numbers need context.
Ask the supplier to define the testing conditions. Request the print speed, number of passes, resolution, drying time, and usable area per hour. Then run a practical test on a 3-by-4-meter wall. Record setup time separately. Measure the finished area, not the printer’s movement. Test it.
Ink usage needs the same attention. A dense graphic with dark colors can consume far more ink than a pale pattern. Ask for milliliters per square meter at several coverage levels. Check whether cleaning cycles and nozzle maintenance are included. A low ink estimate may exclude them.
I once compared two machines using only their advertised hourly rates. My estimate was wrong because one test used a lightweight image and no repositioning. That mistake changed my evaluation method. Keep a simple log of ink added, printed area, cleaning time, and rejected sections. Repeat the test twice. Small differences can reveal unreliable calculations. A transparent supplier should provide test files, measurement methods, and realistic production data rather than impressive numbers alone.
Choosing a wall printer for 3D walls starts with the ink, not the machine frame. The wrong chemistry can ruin a detailed surface.
UV ink cures under ultraviolet lamps within seconds. It works well on coated panels, sealed plaster, and other non-porous materials. However, its surface adhesion depends heavily on cleaning, primer selection, and lamp exposure. Textured walls can create shaded areas where ink remains under-cured. Check those edges carefully.
Water-based ink usually suits porous walls, such as prepared plaster or concrete. It can offer lower odor and reduced VOC emissions, but “water-based” does not always mean VOC-free. Drying depends on airflow, temperature, humidity, and wall absorption. A damp room may produce soft colors, bleeding, or delayed adhesion. Allow enough drying time before applying protective coatings.
Test small areas first. Use the actual wall material, not a smooth sample board. After curing or drying, perform a gentle tape test and rub test. Inspect corners, raised textures, and dark colors. A failed test may reflect poor preparation rather than bad ink. That is easy to overlook.
For UV systems, confirm lamp power, curing distance, and print speed. For water-based systems, check heater settings, ventilation, and drying space. Review safety data and technical sheets before purchase. A machine with impressive resolution still performs poorly when its ink cannot bond reliably.
Tip 1: Check printhead life before comparing prices. Ask for tested page counts, maintenance records, and replacement costs. A clean nozzle test matters more than attractive sales photographs. Tip 2: Inspect ink delivery carefully. Look for stable pressure, sealed tubes, and easy flushing access. Small leaks become expensive quickly.
Tip 3: Confirm software compatibility with your existing workflow. The machine should accept common image formats and work with your operating system. Tip 4: Test wall measurement and calibration tools. Uneven floors or textured surfaces can distort alignment. I once trusted automatic calibration too much. Manual correction was still necessary. Tip 5: Review safety features closely. Emergency stops, grounded wiring, guarded moving parts, and clear ventilation requirements should be documented. Operators need practical training, not only a short demonstration.
Tip 6: Examine after-sales support before purchase. Ask about response times, remote troubleshooting, spare-part availability, and warranty exclusions. Request written service procedures. Tip 7: Watch a complete sample job, from setup to cleaning. This reveals noise, software delays, ink handling, and daily maintenance demands. A dependable supplier should explain limitations honestly. If every answer sounds perfect, investigate further. Real equipment always has trade-offs.
| Tip | Evaluation Dimension | Practical Data and Recommended Standard | How to Verify Before Purchase | Warning Signs |
|---|---|---|---|---|
| 1 | Printhead Life and Replacement Cost |
Key benchmark Printhead life depends on ink chemistry, cleaning frequency, nozzle clogging, humidity, and operating conditions. Compare the manufacturer’s rated service life, replacement price, warranty coverage, and recommended maintenance cycle rather than relying only on a page-count claim. |
Request the printhead model, compatible ink type, documented replacement procedure, expected maintenance interval, and the total cost of one replacement. Ask whether the machine can continue operating with partially blocked nozzles. | An undefined printhead model, no published replacement price, vague lifetime claims, or a requirement to replace the complete carriage when only the printhead is damaged. |
| 2 | Software and File Compatibility |
Workflow standard The system should support commonly used raster and vector workflows, such as PNG, JPEG, TIFF, PDF, or SVG, and should provide scaling, color management, image positioning, and print-resolution controls. |
Test a real project file containing transparency, gradients, fine lines, and text. Confirm operating-system support, RIP software requirements, language availability, software update policy, and whether files can be prepared without proprietary conversion. | Software works only on an outdated operating system, requires an unexplained activation fee, cannot preserve transparency, or lacks a preview and error-checking function. |
| 3 | Wall Surface and 3D-Texture Adaptability |
Application fit Check the supported surface types, maximum texture variation, minimum and maximum print distance, allowable wall angle, and leveling method. A wall printer is not automatically suitable for every uneven, porous, damp, or heavily textured wall. |
Conduct a sample print on the intended wall material. Measure the surface variation, check image alignment across the full height, and inspect adhesion after the ink has dried. Confirm whether primer or surface preparation is required. | The seller provides samples only on smooth boards, gives no surface tolerance, or promises accurate printing on damp, dusty, loose, or highly irregular walls without preparation. |
| 4 | Print Quality and Production Speed |
Output performance Compare resolution, color mode, effective print speed, pass count, curing or drying time, and image quality at normal viewing distance. Higher advertised resolution does not always mean higher visible quality. |
Ask for an unedited sample containing small text, skin tones, gradients, dark areas, and fine lines. Record the time required to print a defined wall area, including setup, alignment, cleaning, and drying. | Speed is quoted only for a low-resolution draft mode, samples are heavily edited, or the quoted production rate excludes calibration, ink changes, maintenance, and wall preparation. |
| 5 | Ink System, Adhesion, and Environmental Resistance |
Durability check Confirm whether the ink is water-based, UV-curable, solvent-based, or another formulation. Review adhesion, light resistance, abrasion resistance, odor, ventilation needs, curing method, and compatibility with the target wall coating. |
Request the ink safety data sheet and technical data sheet. Test adhesion and surface durability after the manufacturer’s stated curing time. Check whether indoor and outdoor use require different ink or protective coating. | No safety documentation is available, the ink type is not disclosed, outdoor durability is promised without test conditions, or the print requires an incompatible wall coating. |
| 6 | Machine and Operator Safety |
Safety baseline The machine should include emergency-stop access, stable mechanical movement, cable protection, collision detection or obstruction control where applicable, electrical protection, and clear ventilation and personal-protection guidance. |
Inspect the emergency stop, power supply, moving rails, wheels, grounding requirements, warning labels, and maintenance access. Review the ink SDS, operator manual, electrical specifications, and required protective equipment. | Exposed moving parts, unstable frames, unclear grounding instructions, strong odor without ventilation guidance, missing emergency-stop controls, or no documented operating procedure. |
| 7 | After-Sales Support, Training, and Spare Parts |
Ownership value Evaluate installation training, remote diagnosis, response time, warranty terms, spare-parts availability, software support period, preventive-maintenance guidance, and the availability of critical consumables. |
Obtain the service terms in writing. Ask for the support contact method, normal response target, warranty exclusions, spare-parts list, training format, repair process, and estimated delivery time for printheads, dampers, pumps, sensors, and cables. | Support is limited to informal messaging, warranty terms are verbal, spare parts are sold only as complete assemblies, training is unavailable, or repair responsibility is unclear after delivery. |